Category Archives: News

Horticultural Society Board named

2016 Board Pic

The 2016 Board of Directors of the Tillsonburg Horticultural Society were installed at the January 5 meeting. Pictured front row, left to right: Catherine Burke, Judi Misener, Christine Nagy and Marian Smith. Middle row, left to right: Juanita DeRoo, Monique Booth, Joan Massicotte, Karen Pritoula, and Marie Smith. Back row, left to right: Richard DeRoo, Dena Luyt, Albert Acre, Benoit Janssens, Penny Esseltine, Jean Mann and Diana Thompson. Absent when the photograph was taken: Carol Maybury and Jan Torrell.


Whistling Gardens – Jan. 5

Darren Heimbecker joins our meeting on Tuesday, January 5th at 7:30 p.m. in the auditorium of the Senior Centre. Darren will be providing us with an update on what’s new and what’s happening at Whistling Gardens. As well, he will talk about some new plants that are ideal for small gardens.

All Green for Christmas

It’s Still Just Dirt – November 2015, The Tillsonburg News
by Penny Esseltine

Santa’s suit is red, snow is white, shiny glitter can be silver or gold, but the dominant, in fact the only Christmas colour at the meeting of the Tillsonburg Horticultural Society earlier in November was green.

Henry Eising, owner of Eising Greenhouses and Garden Centre on Cockshutt Road in Simcoe, came with containers full of fresh cut local greenery. He was eager to share the fine art of making Christmas wreaths from fresh evergreen cuttings. Working alongside Henry was Dave Zeldon, former president of the Simcoe Horticultural Society and past horticultural teacher at Simcoe District High School.

Henry says, “There’s no such thing as an ugly wreath.”  Simply put the task for each of the three, three-person volunteer demonstration teams that night was to make small bundles of branches about the size of the space formed by joining your thumb with your index finger together. Then each team was asked to do the same thing eight times in total. “The bigger the bundle the bigger your wreath will be,” Henry says.

The greenery in Henry’s containers included Fraser Fir from Fox Hollow, Eising grown White Spruce as well as Norway Spruce, White Cedar, Yew, Boxwood, White Pine and Blue Juniper. For Christmas greenery you could also choose Hemlock, Blue Spruce, Austrian Pine or Red Pine.

“There’s an upside down and a right side up to all branches,” Henry says. They definitely look different. For example Fraser Fir branches have white lines on the underneath side. You can choose to have either side facing up.

To form the bundles Henry suggests you start with the longest branch (about 8 to 10 inches) and work your way down so that all of the different kinds of foliage can be seen in the bundle. “The stuff on the outside of the bundle should be the heavier stuff,” he says, “and work your way toward the finer stuff.”

The wreath frames that Henry brought consisted of two connected circular wire frames with pairs of tines spaced evenly around the outside and inside circles. These tines can be pinched together by hand, by using a pair of pliers, or by using Henry’s Wreath Maker 5000 machine. Pinching the tines together around the bundles will hold each bundle of branches in place. The wreath frames come in a variety of sizes with up to 20 pairs of tines for bunches of greenery. The ones we used for demonstration had just eight pairs.

Once you have a bunch of greenery held in place by the tines Henry says to trim off the stem end of the bundle to about two inches past the peg. Then pinch the next bunch in place and so on until you have worked your way around the wreath frame. Lastly, snip off any brown tips or anything that’s sticking out and look to see that the wreath is well-balanced.

You can hang a wreath on your door for the entire festive season. The fresh evergreen smell is marvellous. “To make it last even longer you can spray the wreath with a product called Wilt Proof,” Henry says.

The all-green demonstration wreaths that were created at the meeting consisted of just greenery. “Some people,” Henry says, “ask where all the frou frou glittery stuff is.” He says that if you choose to add decorative pieces, bells or ribbons or bows before Christmas you can take them off after Christmas and your just-green wreath will still be perfectly fine.

Of the three demonstration wreaths assembled at the Horticultural Society meeting the favourite was the one with all of the underside of the foliage facing out. It was lush and full and people thought it looked much more shimmery. It was constructed by the all male threesome of Horticultural Society members Norm, Bill and Louis.

If you’re unsure about trying to make a fresh evergreen wreath of your own at home, Eising’s offers Build Your Own Christmas Wreath Workshops for groups of various sizes in the lead up to the festive season. The cost is about $40 each and this includes the greenery. Call 519-428-4607 for information or visit eising.ca online.

For information about the Tillsonburg Horticultural Society visit tillsonburghorticultural.ca.

Tillsonburg’s Dutch Canadian Friendship Tulip Garden

It’s Still Just Dirt – October 2015, The Tillsonburg News
by Penny Esseltine

From  Bear Lake, Kelowna, and Vancouver in the west to Sackville, Conception Bay, and Charlottetown in the east and even Aklavik in the north, 140 Canadian communities will be planting Dutch-Canadian Friendship Tulip Gardens this fall in recognition of the 70th Anniversary of the original Dutch-Canadian Friendship Tulip Garden planted in Ottawa at the end of World War II in 1945.

And did I mention Tillsonburg. Yes, we are one of the 140 communities selected from the more than 400 applications received by the Canadian Garden Council.

Tillsonburg Director of Parks, Culture and Recreation Rick Cox says he thinks this is a really good thing for this area. “Local people of Dutch ancestry have helped to build this area so it’s appropriate that we recognize and celebrate this connection.”

It all started 70 years ago at the end of the war. Princess Juliana of the Netherlands presented 100,000 tulip bulbs to Ottawa, Canada’s capital, in appreciation of the safe haven that members of Holland’s exiled royal family received during World War II, and in recognition of the role Canadian troops played in the liberation of the Netherlands. This presentation of tulip bulbs was the beginning of the Canadian Tulip Festival.

The tulips in Ottawa have grown to be a symbol of peace, freedom and international friendship. Today over a million tulips in 50 varieties bloom in public spaces across the National Capital Region during the Tulip Festival each year.

Each of the 140 new 70th Anniversary Dutch-Canadian Friendship Tulip Gardens across the country will consist of 700 red and white tulip bulbs (350 of each colour) generously donated by Vesey’s Bulbs in Prince Edward Island. Rick says our bulbs have already arrived.

A planting ceremony for the Tillsonburg Dutch-Canadian Friendship Tulip Garden is set for Saturday morning, November 7 starting at 9:00 a.m. at the northeast corner of the Tillsonburg Cemetery facing Simcoe Street.

Everyone with an interest in the Friendship Garden is invited to come and help plant tulip bulbs. A special invitation is extended to children of all ages, veterans, gardening enthusiasts, and of course local residents of Dutch descent.

If you would like to participate as an individual or as a group you are welcome to come out with a trowel and perhaps a pair of garden gloves too.

Whether you are planning to plant tulip bulbs in the Friendship Garden or at home in your own garden, here are some basic instructions to consider.

  • Tulip bulbs should be planted right side up, at least six to eight inches deep measuring from the  base of the bulb. Ideally you should dig a little deeper to loosen the soil and allow for drainage. Remember, the bigger the bulb the deeper the hole needs to be.
  • Make sure the top of the bulb (the pointy end) is facing up toward the light. You should be able to see leftover root scales on the bottom of the bulb and perhaps some dry remnants of foliage at the top. Set the bulb in the hole and press the soil firmly around it.
  • Water bulbs right after planting. Bulbs will need water to trigger growth.

Of course in the spring we will all be looking for our Dutch-Canadian Friendship Tulip Garden to bloom and Rick says a bloom celebration will be planned. In Southern Ontario tulip bulbs generally bloom between the end of April and the beginning of June depending on the type of tulip and where it’s planted.

In 2016 the Ottawa Tulip Festival expects their tulips to bloom during the annual festival celebration which is scheduled for between May 13 and 23, 2016.

For more information about the Dutch-Canadian Friendship Tulip Gardens visit canadasgardenroute.ca; and for information about the Ottawa Tulip Festival visit tulipfestival.ca.

If you would like more information about Tillsonburg’s Dutch-Canadian Friendship Tulip Garden call Rick Cox at 519-688-3009, ext. 4228.

Lastly, for information about the Tillsonburg Horticultural Society visit tillsonburghorticultural.ca.

2015 Christmas Bus Tour: December 4th

Come join our membership as we travel to the Niagara-on-the-Lake area for a fun filled, packed day of activities including Cole’s Garden Centre, two wineries and shopping. Prior to coming home, we will dine at the Old Winery Restaurant known for its’ fresh Mediterranean Cuisine inspired by the Tuscan countryside, located in the heart of Niagara -on-the-Lake. Please click on link to view itinerary.

Christmas 2015 Tour N-O-T-L

November 3rd meeting – Christmas Urn Demonstration

Come out and join us at our November 3rd meeting, at the Senior Centre at 7:30 p.m. as we watch Sonja Eikelboom, from Eising Garden Centre create a Christmas urn. As we have done previously in the past, the completed project will be won by a lucky member of the Tillsonburg Horticultural Society

Fall is for making your garden amazing

It’s Still  Just Dirt – September 2015, The Tillsonburg News
by Penny Esseltine

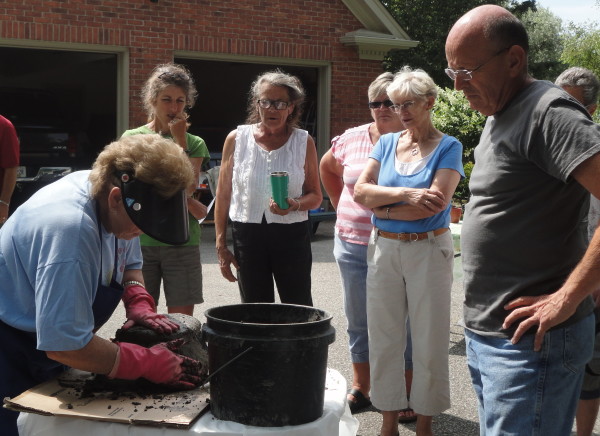
Jim Stinson is the go-to-guy at Canadale Nurseries in St. Thomas. He’s the one who can answer all of your horticultural questions. Jim has worked at Canadale for 30 years and he visited our Horticultural Society’s first post-summer meeting to tell us why fall is for making your garden amazing.

Jim says nurseries like Canadale reduce their plant prices by 20, 30, 40 and even 50 per cent at this time of year. “You can take advantage of the great prices at your local garden centres right now,” he says, “to add interesting new plants to your garden spaces.” Look for shrubs like fothergilla (bottle brush), sweetspire, oak-leaf hydrangea and viburnum, and perennials that bloom in the fall like toad lilies and fall anemones. “Fall leaf colour can be stunning.”

Here for your inspiration are just some of Jim’s fall gardening recommendations.

Clean out annuals. Toss your annuals, soil and all into your composter or onto your compost pile. They are done for the year.

Plant. Fall is the best time of the year to plant trees, shrubs, and perennials.

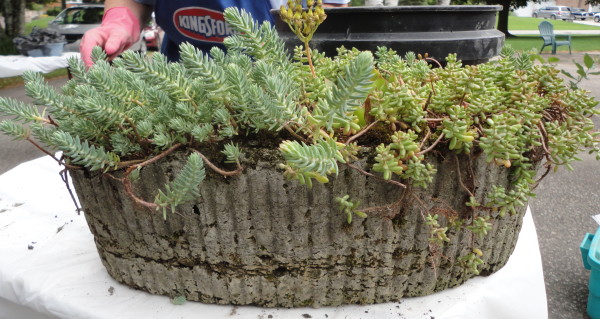
Refresh containers with fall colours. Replace tired old annuals with beautiful fall mums, asters, kale and peppers. Add gourds, pumpkins, leaves and branches. Focus on fall before you prep your containers for winter display.

Dig, divide, and conquer perennials. September is a great time to divide irises, peonies, daylilies, sedum and hostas. Dividing now will give them time to re-establish and they will grown twice as nice in the spring. “As a rule of thumb,” Jim says, “perennials that bloom in the spring should be divided in the fall. Perennials that bloom after mid-June are best divided in the spring.”

Jim says there’s no need to cut perennials back in the fall. Again, his rule of thumb, “if they look good leave them. If they look bad then cut them back.” Leave coneflowers because the birds will feast on the seeds in the flower heads through the winter.

Protect tender roses. In late fall hill up soil and mulch around rose bushes or cover them with rose covers. Clean up fall leaves that can be diseased. Attach climbing roses to supports. Jim says pruning your roses is usually best left until spring.

Improve your lawn. You can improve your lawn by sowing grass seed Jim says. As well he recommends fertilizing your lawn twice in the fall, both at Labour Day and again after Thanksgiving. “The after-Thanksgiving fertilizer will start to work quickly in the spring.”

Protect your garden from winter’s worst. “Keep watering until you are green in the face,” Jim says. Most plants need lots of moisture going into winter. This is especially true for evergreens that are susceptible to desiccation, winter burn, or winter kill. Regular watering will reduce the stress on your plants.

Evaluate your garden. Look at the successes you’ve enjoyed in your garden this year and consider the failures Jim says. “Consider what worked and what didn’t work and why. Make notes and sketches to help plan for next year’s garden changes.”

“Invite constructive criticism,” Jim says. “I want an artist to come over and tell me how to improve my garden. They see things differently.” Ask someone who has a different perspective to tell you what they like and what they would change about your garden.

Think spring. Spring flowering bulbs like tulip, daffodil, crocus, hyacinth, allium, and lilies can go in the ground now. Jim’s advice it to outsmart squirrels with squirrel-resistant bulbs. He says, “Cover your tracks by putting leaves over where you plant bulbs. Squirrels are smart and look for disturbed soil.”

The Tillsonburg Horticultural Society meets the first Tuesday of each month in the Senior Centre Auditorium at the Tillsonburg Community Centre. For additional information about the society visit tillsonburghorticultural.ca.

October 6th Meeting

The Tillsonburg Horticultural Society meets at 7:30 p.m. in the Senior Centre Auditorium at the Tillsonburg Community Centre. Guest speaker Nancy Abra will talk about the horticultural aspects of War Memorial Gardens at Commonwealth War Graves. Nancy is a member of the London Middlesex Master Gardeners and the Thorndale Horticultural Society. As well, she and her husband are both history and military enthusiasts and her presentation comes out of their World War I Trench Tours to France and Belgium.

You Can Make Hypertufa Pots at Home

It’s Still Just Dirt – August 2015, The Tillsonburg News
by Penny Esseltine

Helen Smith is a 20 year Master Gardener, a member of both the Elgin County Master Gardeners, and Aylmer Horticultural Society. As well she has been teaching hypertufa pot making for 18 years. Members of the Tillsonburg Horticultural Society were the beneficiaries of her hypertufa experience as she lead a pot-making workshop for us earlier this month.

Hypertufa Group Demo

The term hypertufa refers to a type of artificial stone and comes from a combination of tufa which is a natural volcanic rock and hyper meaning extremely. Hypertufa pots are extremely rock-like containers. They’re beautifully natural looking, hardy, relatively light-weight and Helen says you can leave them outside through the winter. The demonstration piece that Helen brought to show us was made in a kidney-shaped mould originally used for water plants and it was planted full of sedum and other succulents.

You can use almost anything that has an interesting shape for a mould. Things like nursery pots, bins, boxes, plastic containers, pails –  you choose. Helen recommends starting with something small. First off line your container with a plastic bag. A garbage bag will work well for this. The plastic lining makes it easy to get the pot out of the mould.

Helen says the mix is very important. The basic ratio of ingredients is two parts peat moss, one part portland cement and one part course sand, vermiculite or perlite. For smaller amounts you can mix this together in a bucket. For our group of more than 20 people making pots, the ingredients were mixed together in a wheelbarrow with a short-handled garden hoe. You can also do the mixing with your hands but be sure to wear rubber gloves because the cement will dry them out.

After the dry ingredients are mixed together next comes the water. Add small amounts at a time. “You don’t want the mixture to be either soupy or dry,” Helen says. “It should be the consistency of cottage cheese and if when you squeeze a handful a little water comes out that’s good.” The basic ratio for water is one to one-and-a half parts.

Once the mixture is prepared it’s time to start filling your mould. Helen’s instructions are to “Scoop the mixture into the mould and pack it in the base and around the edges. Small pieces of chicken wire can be pressed into the sides and base for stability and these are placed in the middle of the mix.” Continue adding mix until it is one-and-a-half to two inches thick in the base and around the sides.

“As gardeners,” Helen says, “we know how important drainage is.” Be sure to press three or four holes into the bottom of the pot using your finger or a piece of dowelling. Lastly cover your piece with plastic and set it in a shady area, or a garage, to cure for 24 to 36 hours. “The pot will be heavy to start  but not so much when it dries out,” Helen says.

Turn your mould upside down to remove your pot. You can use a wire brush to rough up or make markings on the outside. Use sand paper to smooth off roughened edges. Sit your pot on a board in the shade, or again the garage. It will take about two more weeks to cure.

“It’s not rocket-science,” Helen says. “In the end your hypertufa pot should resemble natural-looking stone.” You can plant it full of things like hens and chicks, sedum, mosses, portulaca, creeping phlox, ivy, primrose, miniature hostas, or bulbs like snowdrops, crocus and narcissus.

Natural looking hypertufa pots were a big attraction on the Horticultural Society’s Buffalo National Garden Tour last summer. Making them here at home in a large group on a sunny morning with Helen’s simple instructions was as easy as pie.

Hypertufa Pot

You can use these basic instructions or look for more complex ideas on line by googling hypertufa pots. Up pops information from Martha Stewart, Lowe’s Building Centre, Fine Gardening magazine – take your pick. You can add embellishments, press in shapes, even colour the mixture if you like. Hand-made hypertufa pots are guaranteed to add much natural interest to your garden spaces.

The fall season for the Tillsonburg Horticultural Society comes quickly with the September General Meeting scheduled for Tuesday, September 1. Mark your calendars. For additional information visit tillsonburghorticultural.ca.

September 1st Meeting

Please join the Tillsonburg Horticultural Society at their monthly meeting on Tuesday, September 1, 2015 at 7:30 p.m. in the Senior Centre to hear Jim Stinson (Assistant Manager, Canadale Nursery, St. Thomas) speak on “Getting Ready for Winter: Fall Gardening”.