It’s Still Just Dirt – August 2015, The Tillsonburg News
by Penny Esseltine
Helen Smith is a 20 year Master Gardener, a member of both the Elgin County Master Gardeners, and Aylmer Horticultural Society. As well she has been teaching hypertufa pot making for 18 years. Members of the Tillsonburg Horticultural Society were the beneficiaries of her hypertufa experience as she lead a pot-making workshop for us earlier this month.
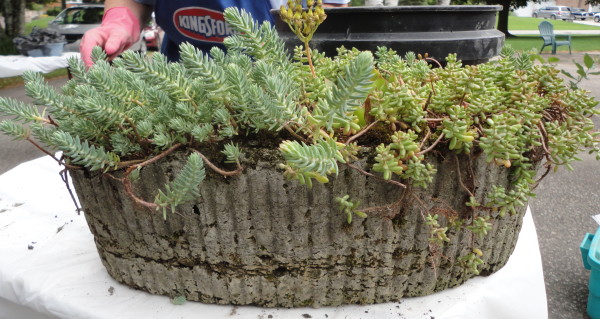
The term hypertufa refers to a type of artificial stone and comes from a combination of tufa which is a natural volcanic rock and hyper meaning extremely. Hypertufa pots are extremely rock-like containers. They’re beautifully natural looking, hardy, relatively light-weight and Helen says you can leave them outside through the winter. The demonstration piece that Helen brought to show us was made in a kidney-shaped mould originally used for water plants and it was planted full of sedum and other succulents.
You can use almost anything that has an interesting shape for a mould. Things like nursery pots, bins, boxes, plastic containers, pails – you choose. Helen recommends starting with something small. First off line your container with a plastic bag. A garbage bag will work well for this. The plastic lining makes it easy to get the pot out of the mould.
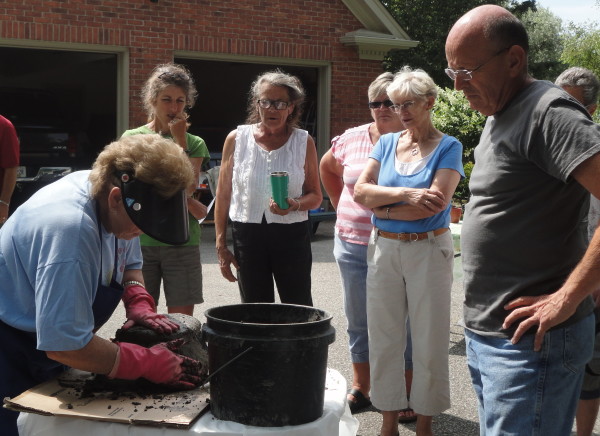
Helen says the mix is very important. The basic ratio of ingredients is two parts peat moss, one part portland cement and one part course sand, vermiculite or perlite. For smaller amounts you can mix this together in a bucket. For our group of more than 20 people making pots, the ingredients were mixed together in a wheelbarrow with a short-handled garden hoe. You can also do the mixing with your hands but be sure to wear rubber gloves because the cement will dry them out.
After the dry ingredients are mixed together next comes the water. Add small amounts at a time. “You don’t want the mixture to be either soupy or dry,” Helen says. “It should be the consistency of cottage cheese and if when you squeeze a handful a little water comes out that’s good.” The basic ratio for water is one to one-and-a half parts.
Once the mixture is prepared it’s time to start filling your mould. Helen’s instructions are to “Scoop the mixture into the mould and pack it in the base and around the edges. Small pieces of chicken wire can be pressed into the sides and base for stability and these are placed in the middle of the mix.” Continue adding mix until it is one-and-a-half to two inches thick in the base and around the sides.
“As gardeners,” Helen says, “we know how important drainage is.” Be sure to press three or four holes into the bottom of the pot using your finger or a piece of dowelling. Lastly cover your piece with plastic and set it in a shady area, or a garage, to cure for 24 to 36 hours. “The pot will be heavy to start but not so much when it dries out,” Helen says.
Turn your mould upside down to remove your pot. You can use a wire brush to rough up or make markings on the outside. Use sand paper to smooth off roughened edges. Sit your pot on a board in the shade, or again the garage. It will take about two more weeks to cure.
“It’s not rocket-science,” Helen says. “In the end your hypertufa pot should resemble natural-looking stone.” You can plant it full of things like hens and chicks, sedum, mosses, portulaca, creeping phlox, ivy, primrose, miniature hostas, or bulbs like snowdrops, crocus and narcissus.
Natural looking hypertufa pots were a big attraction on the Horticultural Society’s Buffalo National Garden Tour last summer. Making them here at home in a large group on a sunny morning with Helen’s simple instructions was as easy as pie.
You can use these basic instructions or look for more complex ideas on line by googling hypertufa pots. Up pops information from Martha Stewart, Lowe’s Building Centre, Fine Gardening magazine – take your pick. You can add embellishments, press in shapes, even colour the mixture if you like. Hand-made hypertufa pots are guaranteed to add much natural interest to your garden spaces.
The fall season for the Tillsonburg Horticultural Society comes quickly with the September General Meeting scheduled for Tuesday, September 1. Mark your calendars. For additional information visit tillsonburghorticultural.ca.